Email Outreach Technical Infrastructure
How to build your email infra for sales outreach for $23.35/mo

So you’ve built a high-ticket product… but how do you sell it?
Often the answer is— Direct Sales!
Cold emailing and calling your prospects, booking demos, and closing them.
But before you fire off 1,000 cold emails, you should know that cold emailing is science.
The first part of science is setting up your infrastructure correctly…
So your emails end up in your prospect’s primary inboxes, not their spam folder.
So how do you do it?
1. Setting Up Your Domains
Go to porkbun.com to purchase domains.
Why are we purchasing additional domains?
Domains that you buy will send users to your main website when visited.
You buy domains because you want to avoid email accounts from getting “burned”
“Burning” your domain means it ends up on Google’s or Microsoft’s spam filters.
If you use your main domain to email prospects and it gets “burned”, it’s nearly impossible to get it off the spam lists/filters.
So it’s best to use domains as “burners”.
If one of your domains gets “burned”, you can always set up another one.
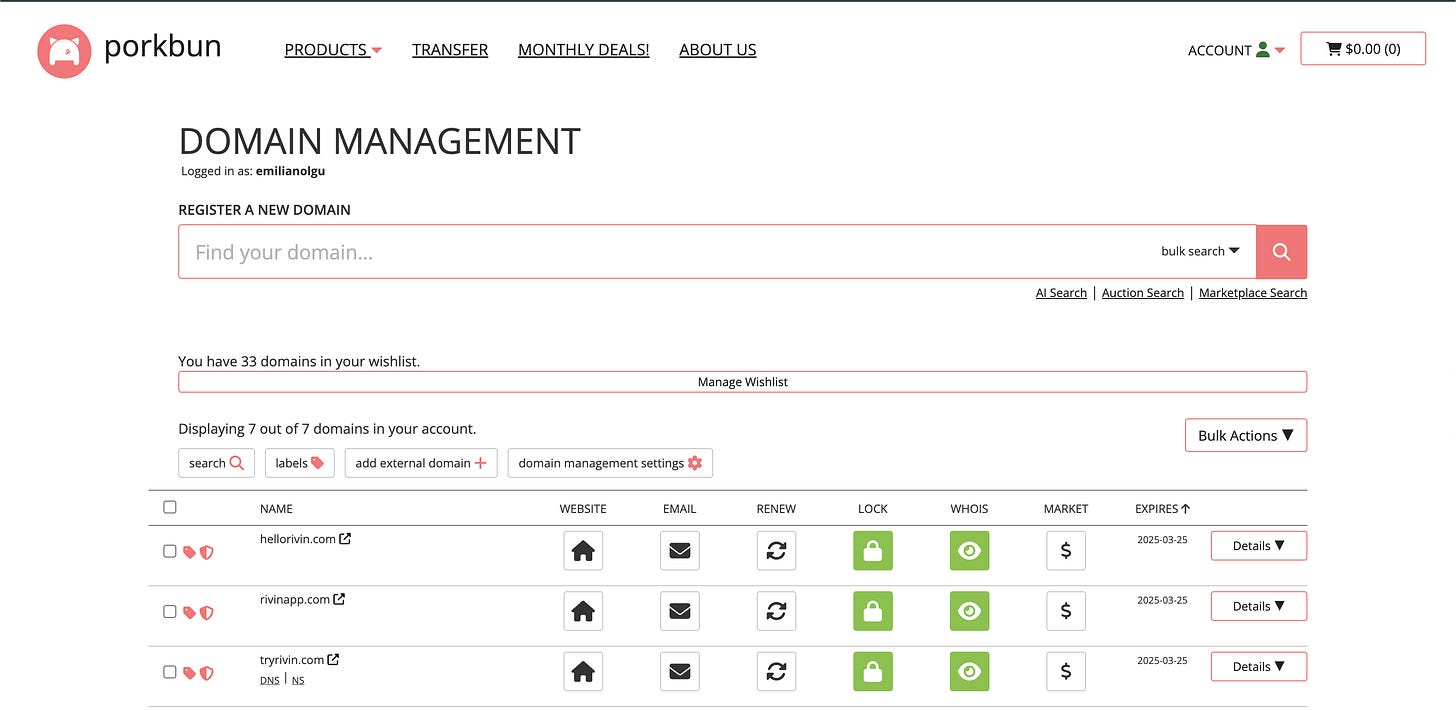
Purchasing domains
Navigate to the home screen of Porkbun and search for your domains.
You can use the bulk search feature.
You need to purchase “.com” domains for the best performance.
Sending emails from domains like rivin.io vs. getrivin.com… the “.com” domains will see higher performance.
What to avoid:
“-”
Numbers
Weird characters
All of these will hurt your campaigns.
For reference, at Rivin we use domains like:
getrivin.com
tryrivin.com
hellorivin.com
rivinapp.com
Use pre/post-fixes like “get”, “try”, and “join”— the cost should be $6.99/year per domain.
Setting Up Redirects
After you purchase your domains, you want to redirect these domains to your main domain.
Head to ACCOUNT and then Domain Management

Tick the boxes on the left of your domains
Click Bulk Actions and General Bulk Options

Head to URL Forwarding

Leave the Hostname blank and enter your main domain under Forward Traffic
Then click Toggle advanced settings and select Permanent Redirect (301).
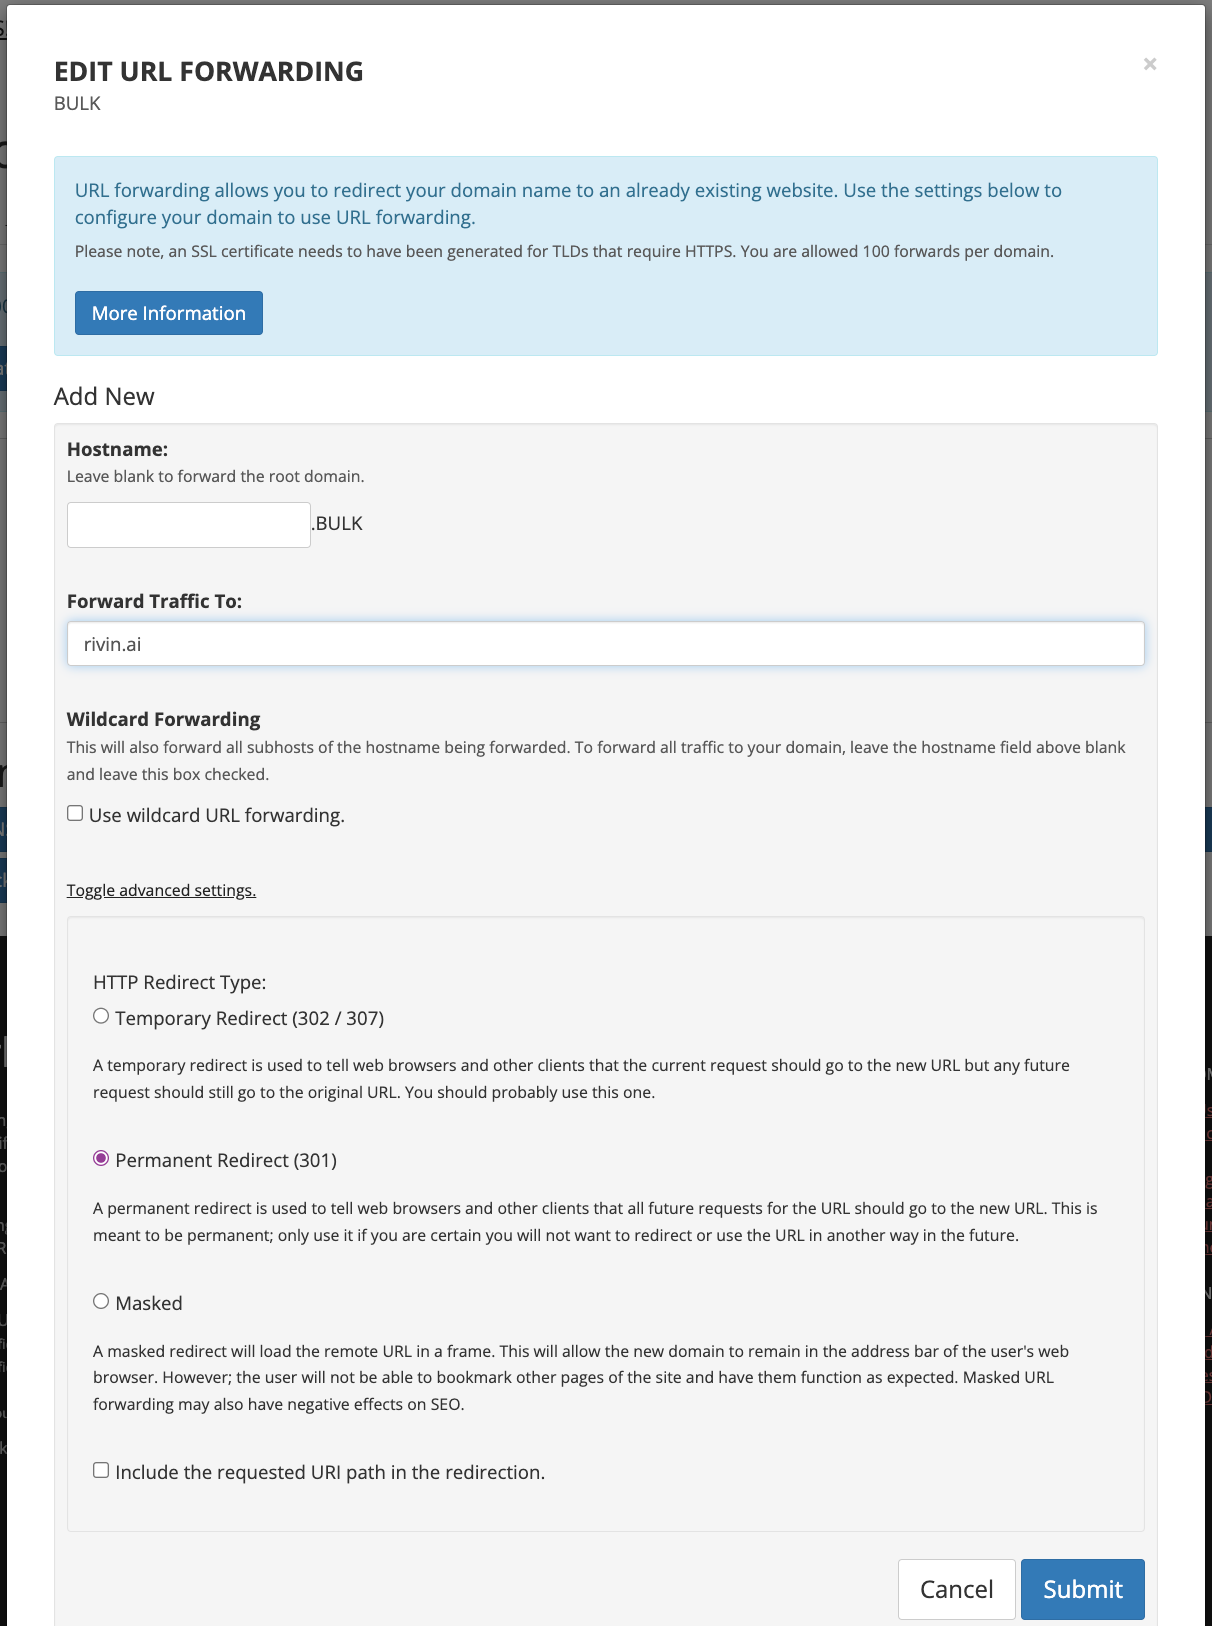
Click Submit.


Great! You have now purchased outreach domains and set up your domain forwarding!
2. Creating Your Email Accounts With Outlook
(In the future, I’ll update this guide to work with Google Workspace too!)
Now you need to create email addresses for each of your domains.
To do this we will be using Microsoft Outlook:
Go to: https://www.microsoft.com/microsoft-365/business/compare-all-microsoft-365-business-products?rtc=1
Click: For business > Microsoft 365 Business Basic > Buy now

Enter your main domain email as your login email.
Fill in your details and click Next.
Ensure you select company size - select 5-9
Enter the number of licenses. You want 3 email accounts on this Microsoft admin account— one for each domain. So select 3 licenses.
Press Update after— this will cost $7.20/month per email.
Then Add payment method
Enter your details and then press Place order
Press Start using Microsoft 365 business basic
The first user you’re logged into is your admin account login. We do not want to use a license for our login email, only for the domains we will be using.
Click on the user
Click Licenses and apps
Untick this box then press Save changes.
We will now add the Domains to your Microsoft account and set them up for outreach.
Ensure you’re logged into the Microsoft admin center: https://admin.microsoft.com/#/homepage
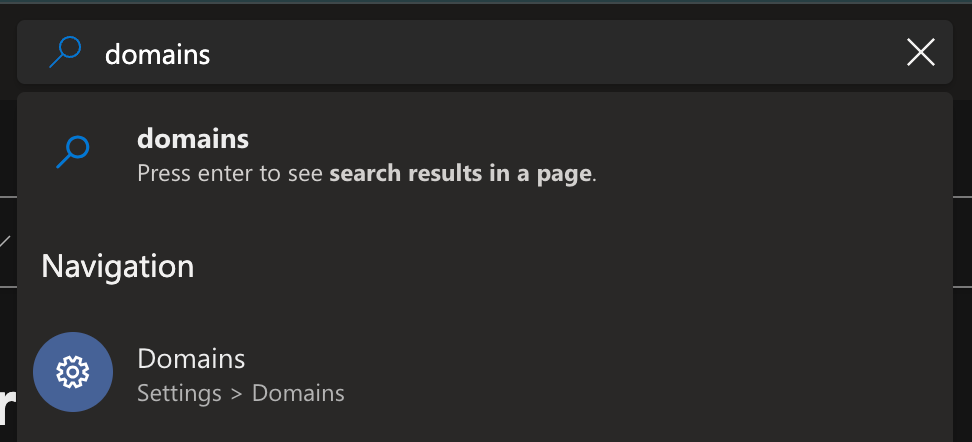
Search Domains in the search bar and select it under Navigation

Click add domain

Enter the domain name. This will be one of the outreach domains that you have purchased
Select the first option to verify your domain by adding a TXT record to the domain’s DNS record

Open Porkbun domain management and add the TXT record that Microsoft gives you inside the DNS records of the domain in Porkbun.

Once the DNS record has been configured— which can take up to 2 hours, press Verify
Next we need to configure the MX, CNAME, and TXT records. This is done the same way we added the TXT record, except we select the appropriate name from the Porkbun dropdown and then copy and paste the values from Microsoft.

Once done, press continue. This can take up to 2 hours to configure.
Repeat for the rest of your outreach domains, remember we can only have 20 domains on 1 Microsoft admin account. If you require more, go back to Step 1 and make a new Microsoft admin account.
We will now add DKIM & DMARC Records. DKIM is a “signature” added to your emails that tells email providers it is coming from the owner of the domain(you). DMARC validates your identity using DKIM and tells email recipients what to do if your email is “fishy” and has mismatched authentication data.
There is another authentication method called SPF that is similar to DKIM. When you set up your accounts on Microsoft they take care of your SPF record for you.
SPF, DKIM, & DMARC are extremely important and massively improve deliverability. This is because they authenticate your email and domain owner status— and thus help email recipients fight phishing and fraud.
Search DKIM in the search bar and select the option below

Click the domain that you want to generate a DKIM record for
Press Create DKIM keys
The CNAME records will populate on the screen. There will be 2. Head back to Porkbun to add the DNS under “CNAME” from the dropdown.
Repeat for the second record
They may take a few hours to configure. Once ready, turn them on.

Repeat for all domains
Now we’ll add the DMARC as a TXT record to your domain.
Here is how it should look
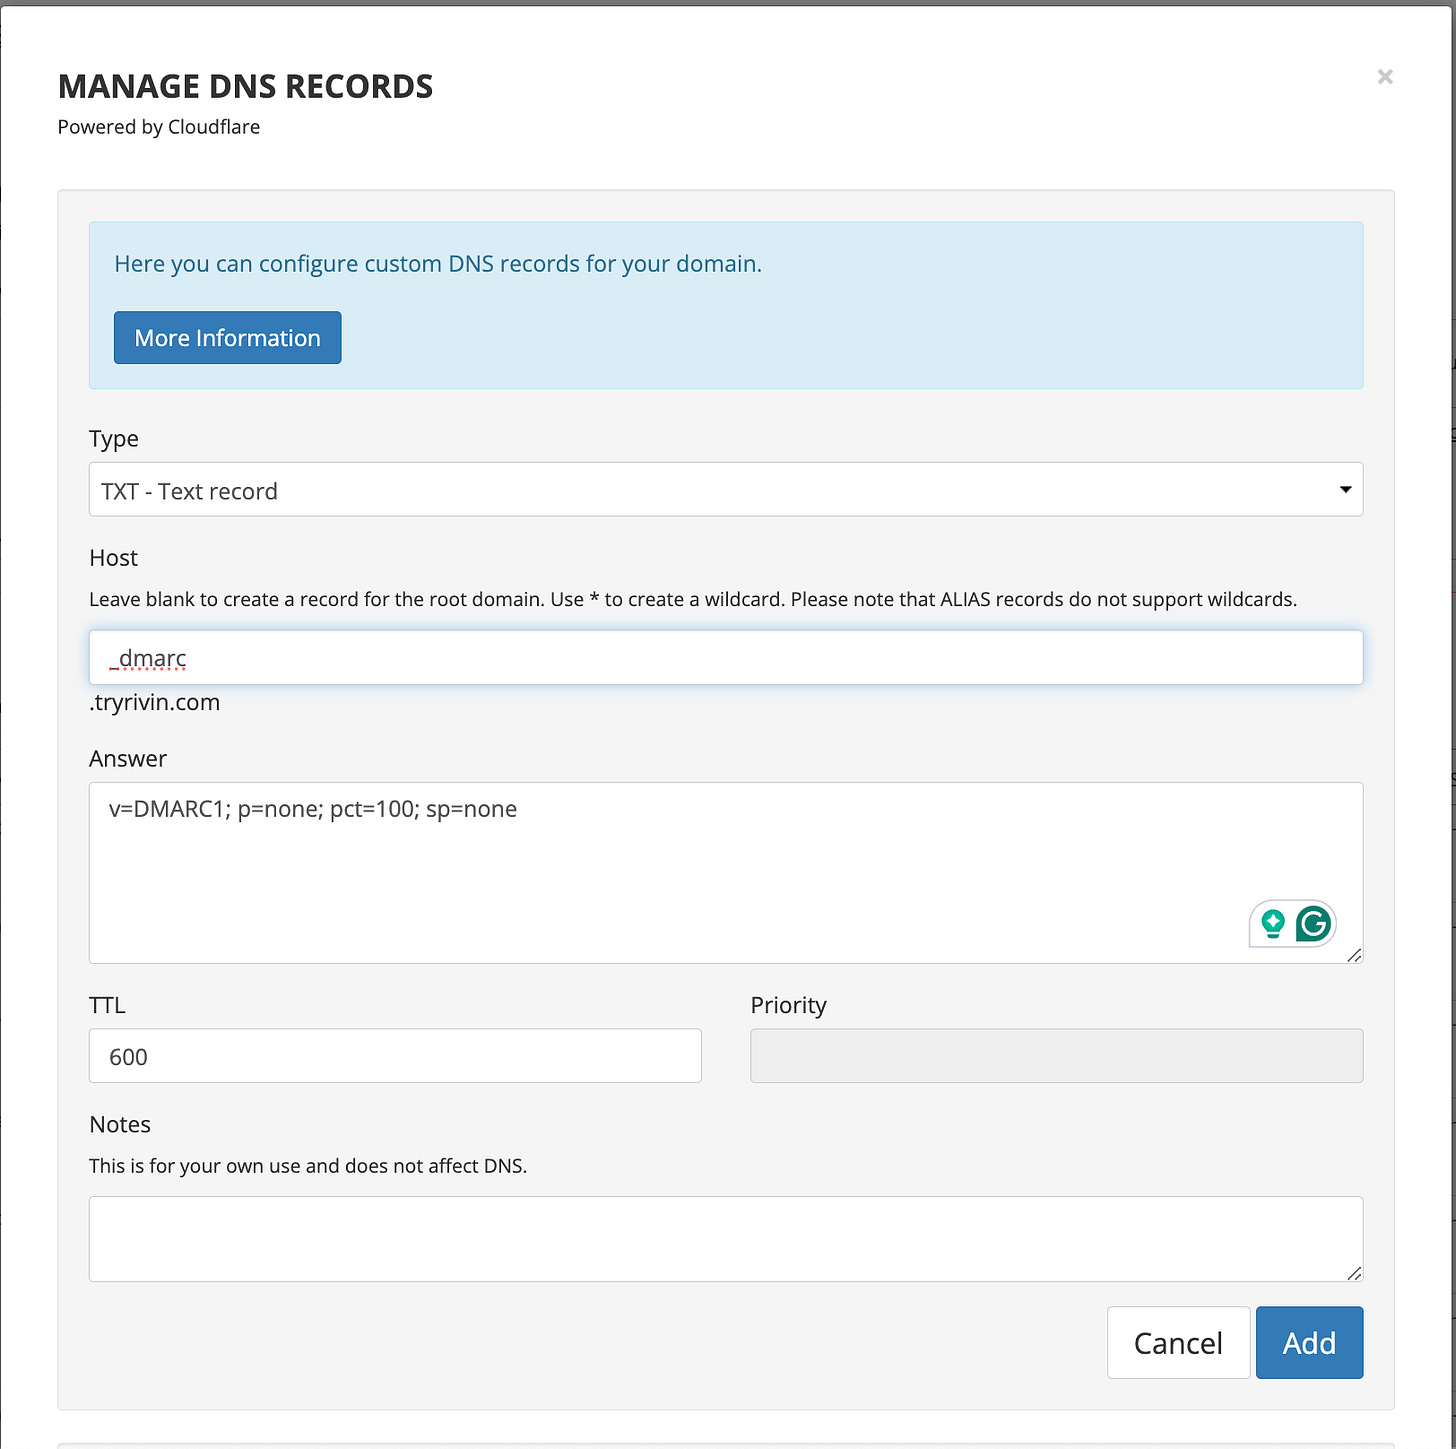
Save and repeat for all outreach domains
We will now create the email accounts for each of your domains.
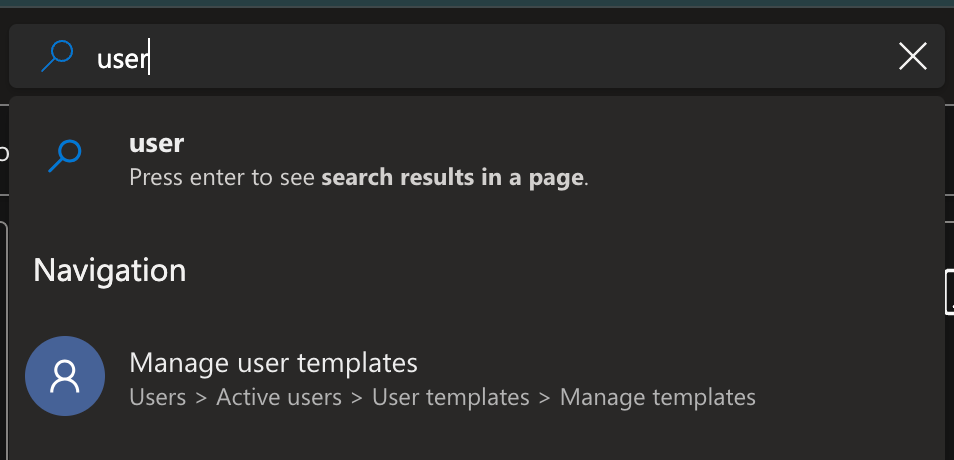
Search user and Manage user templates

Select Active users
Select Add a user
Enter the details for the email account. First name, Last name, Display name (The display name is what shows up in recipients’ inboxes so make it the full name), Username (this will be the first name), and Domains (this will be the outreach domain you want to use for this user).
Uncheck Automatically create a password and Require this user to change their password when they first sign in. Add a password for the account and store it somewhere safe. Select Next.
Select the location and assign a license to the user. Then press Next.
Skip Optional settings and Finish adding the user.
We now want to add a profile photo to the accounts
Make sure you're logged in with your Microsoft admin account email address
Click on the user, change the photo, update the photo, and save.
We now want to disable security so we aren’t prompted to enable 2FA.
Login to the admin panel with the admin account
Head to Properties
Select Manage security details
Select Disabled under Security defaults, select a reason, and Save


3. Warming Up Your Emails
Great! Now you have purchased domains and created email accounts for each of them!
But there’s still one more crucial step: warming up your emails.
What does “warming up” your email mean?
Companies like Google and Microsoft can see your email is new and contains no history— so they will send you to spam ASAP.
The way we avoid this is by joining an “email pool”.
An “email pool” is a network of thousands to millions of companies that agree to send each other emails to boost their internal email “rating” within Google, Microsoft, and other email mailboxes.
“Warming up” an email involves joining a pool and automatically sending and replying to emails you receive from other “pool” members.
By signing up for a trial for software like instantly.ai, smartlead.ai, or lemlist.com….
You can get email warming for free!
Your outreach software of choice will likely also provide email warming.
These are the settings you need to use to maximize performance.
Set Warming to 20: Configure the warming setting to 20, indicating the number of warm-up emails to be sent per day.
Gradual Increase: Increase the warming rate by 3-5 emails per day. This gradual increment helps establish a positive sending reputation over time.
Two Weeks Warming Period: Allow the warming process to continue for a minimum of two weeks. This duration ensures an adequate time to build up your emails’ reputations.
Initial Cold Email Volume Sending Schedule
Week 1 - Send 5 emails per day per email address
Week 2 - Send 10 emails per day per email address
Week 3 - Send 20 emails per day per email address
Week 4 - Send 30 emails per day per email address (don’t send more than 30 emails per day per email)
4. Connecting Your Email Accounts To Your Outreach Software
After all of this:
You have domains
You have mail addresses for each of them
Your email accounts have good ratings with Google & Microsoft
Lastly, connect your email to your outreach software of choice like Lemlist.com, Outreach, or Salesloft… and you’re ready to go!
You can now send cold emails to prospects and land in their inbox— not spam or promotions.
5. Next Steps: How To Structure Emails To Keep Your Email Rating
There are tons of things to avoid in emailing prospects…
If you don’t follow them, your email rating with companies like Google and Microsoft will quickly degrade until all your emails end up in “Spam” and “Promotions”.
The list of what to avoid is long— so I’m making another post about it in the future!
Want to be notified? Sign up as a subscriber— it’s free!